Saturday, April 28, 2012

Jon's XS650 Part I

     Jon's had the itch to build an XS for a while now and he has got his hands on a '77. He wanted to build a lowered flat tracker on a budget, using many refurbished stock parts. A big contributor to the look he's after is the swing arm.
     I kept the design really simple for the swing arm, reusing the axle tensioners and pivot tube, I stretched it 4" from the base line. With that four inch stretch went the shock mounts resulting in a super low profile.  A few cases of beer and a couple of helping hands later he's got a great start to a custom bike. Check it out:
Instagram is wonderful.

I love this shot with the rising sun vibe to it.

1"x 2"- .125"w Tube


Keep it simple.

Friday, April 27, 2012

Flashback: Honda 1.0

     Im going back in time with this. I "finished" the Honda two years ago and haven't stopped finishing it since. Here are some pics of Honda 1.0 in an attempt to build excitement for the release of Honda 3.0 which will inevitably be nothing short of anticlimactic.For what its worth:
Mock up

Fresh motor!

Lesson learned. ^ Too small of a gear.


 .

Wednesday, April 25, 2012

Brake Cleaner and Welding. Just say no.

     Hobbyist or professional, if you weld, then you better know not to pre-clean your parts with brake cleaner. Basically a chemical reaction between the chemicals in brake cleaner (not only brake cleaner) and argon gas creates phosgene gas. And it'll kill ya dead. Don't take my word for it, let Baldey McSoulpatch teach your ass some science. Safety 1st: Pre-Cleaning for Welding

Better learn how to read.

Monday, April 23, 2012

High speed....Hi Death.

     I was thumbing through some old photos and came across some pics of my first "bike". Its a Kikker 5150. The 110cc five speed boosted my ass to a white knuckle speed of 53 mph! But hey, for 15 bills it was pretty cool, and street legal! Kikker has seriously expanded there product line since I've had mine, check em out: Bobber
    
Apes!


My rendition of a COOP painting.


Sunday, April 22, 2012

Paul's '28 A Part II

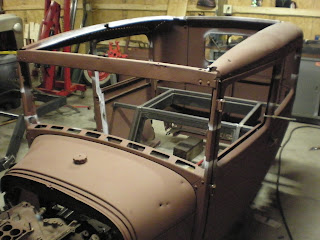
     Paul's been making some good progress on his sedan. It's sitting channeled 4" and the motor mounts and the front suspension are well underway.
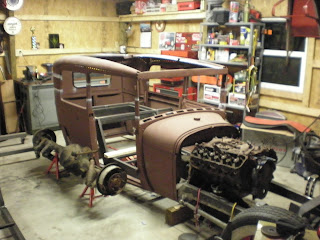
Ford 429 and Toploader trans mocked up.

Sub-frame DONE!


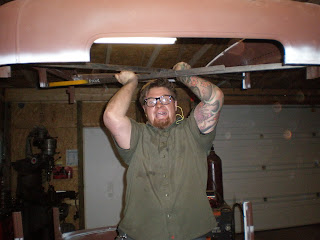
     He called me up to help him give the sedan a haircut. He laid out the 5.75" chop at the pillars with some masking tape and a spray can and we went at it. His weapon of choice was a saws-all with a nice new thin steel blade.  I was surprised how quickly we cut through, no rusty pillars here, I mean this thing is solid!
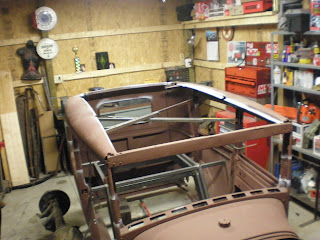
X-brace in the roof.

Byaaaahhhhh!!


     Paul trimmed up the bottoms of the pillars and we set the top back on. I love those moments when you step back to look at the badassness you've created, this was definitely one of those moments. The almost 6" chop is serious! Combined with a 4" channel, there's not a lot of room left!
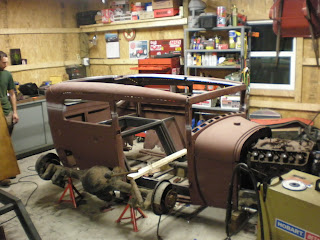

Looks bitchin!

Thursday, April 19, 2012

Paul's '28 A Part I

     I went with Paul to check out this 28' Model A we found on CL. Like all great deals it was in the middle of fucking nowhere. When we rolled up it was obvious were weren't coming home without it. Super clean, straight and on a rolling chassis. Booyah! After the typical bullshitting session, bills were exchanged and we was outta there!
     He had the body and panels media blasted and he laid down some oxide primer. Meanwhile I finished up the chassis. It was fabricated from prints from these guys: Model A Prints. They seem pretty well thought out and from the pictures on their page the design has been proven. The only thing I'd change is the fitment between the tapered rails and the square rear section. I would have liked to have seen the front rails parallel and attach to a drive shaft loop/crossmember but hey, so far so good! Check it out!                              


Tuesday, April 17, 2012

It rubs the lotion on its skin...

     Okay, maybe I'm a pussy. But, when you work with your hands like I do, you're probably familiar with cracks in your hands the size of the Grand Canyon and lets be honest; it hurts like a bitch.
     Behold! I've found relief in this product: O'Keeffe's Working Hands. Yeah it works AND I didn't get payed to say that. Check it out : Working Hands  

... or else it gets the hose again.

Sunday, April 15, 2012

Prototype Cooling Coil

     I've found inspiration to make cooling coils from some left overs I've found in the shop. The one pictured is approximately 17' of 3/8" seamless stainless steel tubing. The tubing is wrapped over a steel buck in the lathe, letting the feed control the pitch of the spiral. I plan on offering two sizes: one for motorcycle oil systems and a larger one for automotive oil and fuel systems, both in polished stainless and brass. Im not sure of the details yet but when all the kinks are worked out ill keep you posted.


Friday, April 13, 2012

Make your prick last longer!

     Prick punch that is anyway. Arguably the most used tool when fab'n in the garage is your center punch. Below, a simple trick to make your punch last longer and wield more accurately. When your punch needs touched up, grind it conically along its axis (Pic #1). The "vertical" striations give it strength. Think of a piece of flat stock; say .25"x2" held horizontally at both ends. With the 2" surface vertical, it resists flexing (or deforming in this case) much more than if you flipped it on its short side. This principal should be applied to everything you fabricate.
     Bottom line, grind your punches with a medium grit wheel like in Pic # 1 and you will notice a difference!

Yeah!

Nooo!


Wednesday, April 11, 2012

Well....

     Maybe the best part is that we share the same Alma mater. Hmmm, perhaps I should have waited around to see who was driving this Ess-po-de-shun.

Case closed.

Tuesday, April 10, 2012

Holy Rotors!!

     3 hours of math, a trip to McMasterCarr and 6.5 hours of drilling (without a digital readout), Honda 3.0 gets a new pair or rotors. 135 - 3/8" holes on each rotor reduced the weight over 1.2 lbs per! Nothing better than brand new TiN coated Cobalt drill and counter sink. Mmmmmm, cuts so nice.
     Note to the DIYers: Don't use heavy cutting oil when drilling rotors. It will work harden like right fucking now! Im not a metallurgist but I imagine they're composed of high carbon content. Flood the tool if you can or, chill that bit with compressed air like I did.
      Check in soon for glam pics of Honda 3.0.

Gotta find that center.

Voila!